Hammers, heat, and your own ninja tool. This Kyoto class turns a pop-culture idea into real craft work, from heating steel to shaping, engraving kanji, and finishing it for display. You’ll work with real metal under an English-speaking instructor, then leave with a souvenir you made yourself.
I especially love two parts. First, the 800°C furnace moment is the star of the show: you get to hit the hot steel and watch it change form. Second, you end by taking home your finished weapon in a beautiful box, custom marked with your chosen kanji.
One thing to plan for: some weapon choices can add cost (for example, a kunai has an extra fee), and the finished weapon has flight rules. You’ll need to pack it in checked luggage, not carry-on.
In This Review
- Key Highlights You’ll Remember
- Samurai Workwear and the Studio Atmosphere
- Choosing Your Shuriken or Kunai (and the Extra Fee Reality)
- The 800°C Furnace Moment: Where You Swing the Hammer
- Shaping the Blade: Belt Sander Control and the Look of Precision
- Kanji Engraving: Your Personal Signature on Steel
- Blackening the Steel and Final Polish for a Display-Ready Finish
- Ninja Knowledge Session: Context That Makes It Mean Something
- Taking Home Your Weapon Box (and How to Pack for Flights)
- Price and Value: Is $148 for 150 Minutes Worth It?
- Location Near Hieizanguchi Station: How to Arrive Without Worry
- Who This Kyoto Ninja Weapon Forging Class Fits Best
- Should You Book This Ninja Weapon Forging Experience?
Key Highlights You’ll Remember

- Hands-on forging with real steel at high heat, with staff guiding your strikes
- Pick your weapon style (shuriken options included; kunai can cost extra)
- Kanji engraving so your ninja tool feels personal
- Blackening + final polish for a dramatic, display-ready finish
- Near Hieizanguchi Station and easy to find, with clear meet-point directions
Samurai Workwear and the Studio Atmosphere

When you arrive, the experience starts with a quick reset of your mindset. You put on a traditional blacksmith outfit (samue) and wrap a tenugui around your head. It looks simple, but it matters. The studio isn’t trying to turn you into a movie extra. It sets a disciplined, workshop feel—so when you’re told how to hold the tools, you’re ready to focus.
The vibe is practical and friendly. In particular, you’ll likely meet instructors who take their roles seriously and still manage to keep energy high. In the class I’d recommend you watch for a few specific staff talents: Taka’s teaching style is often described as energetic and engaging, and other team members help with details like engraving support and day-of guidance.
If you want photos and video, you can usually capture plenty—especially during the forging and engraving stages, where the action is in plain sight. It’s a good idea to bring a camera or phone charger, just in case you get hooked and lose track of time.
Other ninja experiences in Kyoto



Choosing Your Shuriken or Kunai (and the Extra Fee Reality)

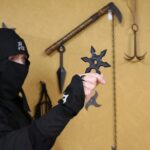
Your biggest early decision is what you want to forge. The class gives you choices in the ninja-weapon family, including three shuriken styles and a kunai option.
Here’s the key cost detail: if you want the kunai, there’s an additional ¥3,000 fee. The experience will still be the same overall structure—heat, hammering, shaping, engraving, finishing—but your materials/processing cost changes.
A practical tip: pick the weapon you’ll actually want to display when you get home. The shuriken designs are different enough that the final look and feel will matter, and the finished piece becomes your wearable-in-your-memory craft project. If you’re traveling with kids or doing this as a group, the shuriken options can be a little easier to agree on because the basic concept is shared—still, everyone should pick the one that makes them smile.
Also note: the studio sells replica swords separately. That doesn’t change your class, but it’s worth knowing if you’re browsing after.
The 800°C Furnace Moment: Where You Swing the Hammer

This is the part people talk about for a reason: you don’t just watch from the sidelines. You see the steel glow inside an 800°C furnace, then you strike the heated metal with a hammer while sparks jump and the metal starts doing what metal does when it’s properly heated.
Even if you’ve never forged anything before, the instruction is built to keep you safe and moving forward step by step. The staff explain the process before you take over, and they keep circulating to correct your technique. That makes a big difference for first-timers, because forging has a rhythm—timing, grip, and angle all matter.
What makes this highlight valuable for you: it’s a hands-on lesson in cause and effect. When the steel is at the right temperature, it shapes. When it’s not, it doesn’t. You feel that difference in real time. That’s the kind of learning that sticks longer than watching a demo.
From the group energy I’ve seen in this kind of class, you’ll also likely notice a common pattern: people get quiet and focused during the hammering, then light up again during the shaping and finishing. It’s normal. You’re basically doing controlled craft work with hot equipment.
Shaping the Blade: Belt Sander Control and the Look of Precision

After the forging, you shift from raw forming to refinement. This is where your weapon starts to look clean and intentional.
You’ll use a professional belt sander to sharpen and define the form. It’s not just about making it pointy. You’re refining the lines so the final shape reads clearly and looks like it came from a workshop, not a weekend hobby. You can also adjust your preferences on sharpness. One reviewer mentioned being able to choose how sharp their piece would be, which matters if you plan to handle it carefully or if you’re thinking about how it will be stored and displayed.
This stage is satisfying because it’s slow enough to notice change. With forging, the biggest changes happen in quick moments. With sanding and refinement, the form emerges gradually. You’ll likely feel proud because you can see your own work in the outcome in a way that’s easier to judge than you might expect.
Kanji Engraving: Your Personal Signature on Steel

Next comes the part that turns a tool into a souvenir with meaning: kanji engraving. You choose a kanji character, and staff engrave it with careful precision. Even if you’re not sure what style of character you want, this step is usually where people commit to personalization. You’re not just paying for an activity; you’re leaving with a piece that reflects your choice.
Practical advice: choose a character you’ll still like months later. If you want something symbolic (strength, peace, focus), think about why it matters to you today. It’s also worth taking a moment before engraving to decide exactly how you want the character to represent the moment you made it.
Engraving is also one of those steps where you’ll feel the difference between a guided craft and a generic craft shop. Staff attention matters here—sharpness, alignment, and neat character edges all show up in the final result.





Blackening the Steel and Final Polish for a Display-Ready Finish

Forged steel doesn’t automatically look like a finished ninja tool. That’s why the finishing steps are more than decoration.
You’ll apply a special solution to blacken the steel. This darkening step gives the piece a dramatic, historically inspired look and helps protect it from rust. Then you do final polishing to bring out the sheen and smoothness.
For you, this matters because it changes the way the weapon photographs and how it looks under light. Without finishing, a handmade item can look rough. With blackening and polish, it becomes something you’ll actually want to put in the box and keep somewhere visible—rather than hide in a drawer.
And yes, the final look is the point where people start asking, Is mine really done? It is. You’ll feel it.
Ninja Knowledge Session: Context That Makes It Mean Something

Between the making steps, you get a ninja knowledge session—history, symbolism, and the kind of hidden techniques tied to the craft’s cultural framing.
This is not about turning the class into a lecture hall. The reason it’s worth your attention is that forging isn’t just mechanical. You’re learning why the process is treated with care. Even if you only remember a few details, it helps you connect the physical steps (heat, shaping, finishing) to the broader theme of craft tradition.
From the experience structure and staff style, this session also helps you appreciate what you’re holding. A weapon is just a shape until you understand why its makers cared about balance, function, and technique.
Taking Home Your Weapon Box (and How to Pack for Flights)

The class ends with the best part of the souvenir: you don’t leave with a printed certificate. You leave with the weapon you made.
You’ll get it in a beautiful box, meant for keeping and cherishing. That packaging matters for travel because it gives the piece protection and also reduces the chance of scratches during your trip.
For flying, the rule is straightforward: you can take the weapon home, but it must go in checked luggage only, not carry-on. Pack it like a small tool. Use the box, add extra cushioning if you’ve got space, and avoid stuffing it loose into a bag.
If you’re bringing it internationally, you’ll likely need to be ready to declare it properly. One practical note from experience: it’s not the kind of item that you can treat like a regular souvenir token. Treat it like equipment.
Price and Value: Is $148 for 150 Minutes Worth It?

At $148 per person for about 150 minutes, this isn’t the cheapest “activity” in Kyoto—and it shouldn’t be. What you’re paying for is time with instructors, real equipment use, and a tangible output: a custom-forged weapon you can take home.
Here’s how I’d judge the value for you:
- If you want a hands-on craft you can show off and keep, this is strong value because the result is yours.
- If you’re the type who loves process—heat, shaping, finishing—this price doesn’t feel random.
- If you only care about a quick photo op, you might find it long and hands-on enough that it doesn’t match your style.
Also keep a close eye on the extra-cost items. The kunai option has an added fee, and some weapon types may cost more. It’s still a good deal, but only if you’re choosing intentionally.
The fact that the class includes uniform, tools, instruction, and your finished weapon makes a big difference. You’re not paying again for the basics.
Location Near Hieizanguchi Station: How to Arrive Without Worry
The meeting point is easy to find once you know the key details. It’s a one-minute walk from Hieizanguchi Station, and you should go up the hill where there is a red postbox in front of the station.
That uphill detail matters because it changes the “easy” score depending on your mobility and the kind of footwear you’re wearing. Plan for a short walk uphill on arrival and again when you’re leaving.
Also, don’t assume Kyoto transit will drop you right at the door if you’re coming from the city center. One common practical approach is to use a taxi and then walk the last bit from the station. You’ll save time and reduce stress, especially if you have kids or you’re on a tight schedule.
Who This Kyoto Ninja Weapon Forging Class Fits Best
This is a great fit if you want:
- a truly hands-on Kyoto activity with clear steps and guidance
- a craft souvenir that’s more personal than a store-bought trinket
- an experience that mixes making with short cultural context
It’s also a solid family choice. Reviews include kids as young as elementary age, with parents emphasizing safety and step-by-step help. Adults also tend to love it because you can focus for hours without needing special background knowledge.
If you’re traveling solo, it can still work well because the instructors guide the process and you’re actively doing the same tasks as everyone else in the class. You’ll likely meet people in the group just by sharing the forging and finishing steps.
Should You Book This Ninja Weapon Forging Experience?
Book it if you want a Kyoto souvenir with real craft effort behind it. The hammering at furnace heat and the kanji engraving are the two strongest reasons: you get a story you can actually tell, and you get something you can keep.
Skip it or reconsider if:
- you’re not interested in hands-on work and prefer passive sightseeing
- you’re sensitive to extra fees depending on weapon choice
- you don’t want to deal with checked-luggage packing rules for the finished piece
If you’re deciding right now, here’s my quick decision rule: if you love the idea of making something with your own hands and seeing it transform from rough metal to a finished display object, you’ll probably be happy you booked.